|
Complete the design of Your room with Architectural Molding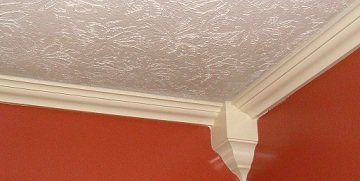
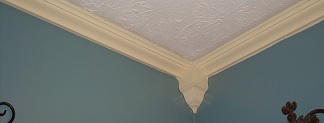
I have added several photos of the architectural molding used on our home during our renovation. There are many styles of molding to choose of from. Pick the look that works best for your style to get the look you want for your home. See the photo of the crown molding on the left that is used in the dining room. This area used to have a wide border all the way around the living, dining and hallway areas. It was removed and crown molding was installed. The overall look was much better.
Recommended Books and Products
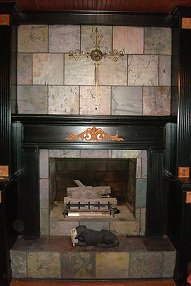
Adding Architectural Molding to a room adds a touch of class to the space.When we repainted our home we added alot of crown molding, chair rail molding, bead board, fluted trim, rosettes,beams and more to various areas of the house. As the photo of our fireplace shows on the right below shows, you would never know that used to be a brick wall. The fireplace now has a mantle, lots of flutted trim, rosettes, and even built in bookcases with cabinets on either side of it. See more photos of the way the family room looks after we added architectural molding during our family room remodel. It was a total transformation compared to the way this house looked when I moved into it. Now it has it own unique style. We have personalized it to reflect our style. I am sure that if we put it on the market it would stand out from other homes in our neighborhood.(we have no intention of moving), so we want it to stand out. We love our home, and are very happy with its transformation!
With the addition of paint colors other than white, the Architectural Molding really popped. Crown molding is a very important part of the overall look of the room. This important Architectural-Molding is the subject of the ebook below.
I will be adding more information and photos to this page, but I have come across this valuable ebook that gives you more information on how to add crown molding than I ever could.
Look the ebook below, The Step by Step Guide to Basic Crown Molding over. And consider adding trim to your home improvement projects for a classy, finished touch to the room.
Cutting the corners for crown molding can be very tricky..this ebook clears up the mystery.
~~~~~~~~~~~~~~~~~~~~~~~~~~~~~~~~~~~~~~~~~~~~~~~~~~~~~~~~~~~~~~~~ ~~~~~~~~~~~~~~~~~~~~~~~~~~~~~~~~~~~~~~~~~~~~~~~~~~~~~~~~~~~~~~~~ Step-by-Step Guide to Basic Crown Molding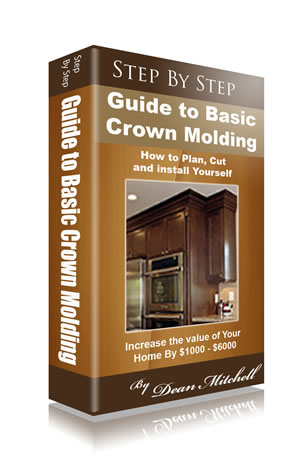
Learn the Ultimate Method of How Crown Molding is Cut and Installed in 4 Easy Steps To Save You Massive Sums of Money – Click Here! Discover a proven system for cutting crown molding that will save you 10-50 hours of time and 100’s of dollars in miss cut pieces.
“Step-by-Step Guide to Basic Crown Molding” If you want to save thousands of dollars and increase the value of your home, the techniques you will learn from this E-Book will become a huge benefit you. Within this book you will learn everything you need to know to complete your own crown molding job from start to finish; resulting in a very clean, professional installation.
Why You Need This:Not only will you discover the step-by-step process of doing a professional crown molding job, you will learn… The complete list of tools that will save you the most time and money. Avoid running back and forth to the hardware store! P. 7-8 How to be safe, so you can still go to work the next day with all of your fingers, toes and extremities intact. P. 8
Which crown molding adds the most appeal, value and worth to your home. P. 10-12
How to measure crown molding using simplified time and money saving steps when estimating and ordering. P. 13-14
Tricks for determining crown molding angles that will save you time, headaches and confusion of complex calculations. P. 15-16
How to set up for crown molding to reduce the need of a second person. P. 17-20 The cleanest inside crown molding corners to increase the value of your house – as opposed to decreasing the value due to lack of knowledge. P. 21 How crown molding ends & extends with a few easy strategies that will make you look like a pro. P. 22-27 How to cut and measure crown molding angles; minimizing costly mistakes of cutting pieces that are too short. P 28-29 The simple ways of installing crown molding and how the pros close in the gaps. P. 30-32 How to make the job look like a woodworking master finished it off! Quote:“A real craftsman is one that can hide his mistakes without anyone knowing.” P. 33-34 The Information you will receive in this E-Book is Priceless Click Here!To Get Your Copy Today! ~~~~~~~~~~~~~~~~~~~~~~~~~~~~~~~~~~~~~~~~~~~~~~~~~~~~~~~~~~~~~~~~ Here are some photos of more Architectural Molding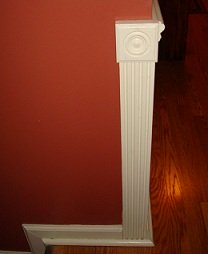
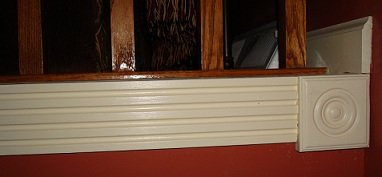
This photo on the right shows fluted trim and a rosette. This trim is painted vanilla bean color. I used a semi gloss paint so it can be wiped clean with needed. This is the area where the beadboard wainscot ends in the hallway and the stairway begins. The photo below shows the same type of trim used on the side with the stair rail. We added all of this architectural molding as we renovated the house.
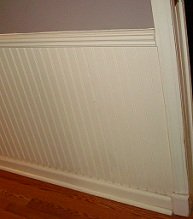
This photos shows beadboard wainscoting used in the hallway. Notice the chair rail molding. We actually used 2 pieces of trim to make this chair rail. The color is the same on all of the trim on this floor.
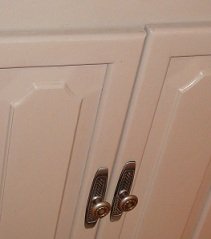
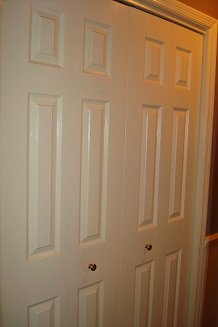
The entry doors into the rooms have six panels and new closet doors were added to match. See photo on the right. New hardware was also added to the doors. The wainscoting and chair rail were extended into the hallway bathroom.

The vanity front was painted to match the color of the hallway. New hardware was added. Actually there was alot more work done in this bathroom wall paper was removed, new sheetrock installed and a new 1 piece tub/shower was installed. Plus new flooring to match the hallway, living and dining rooms was installed. Crown molding was also installed in the hallway bathroom. 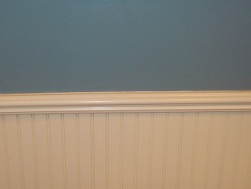
The changes continue into the bedrooms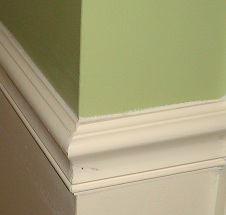
Other rooms upstairs continue with the chair rail, as shown in this photo. This is a guest bedroom. Overall we added alot of details, by including architectural molding to the home. You can too. IF you want start with one room, when you see the difference it makes I bet you will add more just like we have. Architectural molding helps to separate our home from other similar style houses in the area we live. So in the future, when we do decide to sell it, buyers will not feel like they are looking at the same home, just a different color, because there are some homes in the area that are close in size and layout. See how we transformed our basement with architectural molding when we remodeled it. .
Other ways to improve your home include making the most out of the available storage space in your attic. See what we did here.
|
SAVE MONEY WHEN YOUSHOP OUR SPECIALTY STORESFOR YOUR HEALTH & YOUR HOME AND GARDEN NEEDS
Moringa Pills, Powder and Tea, & Diet and Nutrition Products
Shop our Appliances and Electronics Store
Shop our Book Store, for Books and Magazines
Shop Our Furniture and Home Decor Store
Shop Our Garden Decor and for the Birds Store
Shop Our Kindle Store for Ereaders and Ebooks
Shop Our Backyard Living Store, for Firepits, Grills, Patio Furniture & more
Shop Our Halloween Store for Decorations and Costumes
Shop Our Home Improvement Store For Hardware
Shop Our Christmas Decorations Store
Shop Our Lighting Store For Inside and Out
Shop Our Home Improvement Store For Tools & Building Supplies
Shop for Your Basement Rec Room, Bars , Tools and Accessories
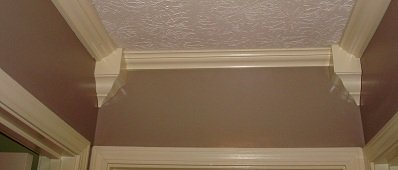 See the photo of the crown molding used in the hallway. With the addition of the crown molding, chair rail molding and beadboard wainscoting it breaks up the long narrow look the hallway had before. Now it has more interest and is more appealing to look at.
